I really wanted to take a metal clay class at a local arts center here, but it filled up before I could register. Instead, I signed up for Style School. I’ve really enjoyed the projects so far. (I have pictures of some of them, but I only seem to take them in poor lighting conditions so I’ll have to remedy that soon!) I really enjoyed (and continue to enjoy) building my notebook (Style File) for the class. The most recent projects have been a huge challenge when it comes to making them my own and working my own style into them. The questions raised by those projects and the Style File have made me recognize how often I let my fears control what I show and explore. In literature and art, I often appreciate vulnerability and openness, which makes it a tad odd (IMHO) that I find it very difficult to be open and honest about what I enjoy or want to try. For example, I’ve noticed that I avoided color schemes or motifs that I thought would make me seem childish or young despite enjoying them. (I’ll spare you my analysis on why, in the past, I’ve tried to avoid those particular adjectives because it’s long-winded.) Noticing that pattern though, has given me a little push to try a little less judgement and a little more variety and I am pleased with the results.
 Any Style School readers?
I received some great bull head charms from Vintageday‘s Etsy shop as part of the Totally Tutorials Program! As part of the deal, I created a tutorial to show everyone how to make the jewelry that I made with them! For more information, tutorials, and chances to participate, please visit the Totally Tutorials blog!
The Necklace: 

This necklace is fairly simple to make, but it adds great impact and the technique can work with a variety of materials.
To create the necklace, I added two types of turquoise colored beads, silver bell-shaped bead caps, silver round beads, and a lobster clasp to some black beading thread. 


I measured the length of the necklace by draping a string on my own neck to see where I wanted the charm to fall. I staggered the rest of the lengths around this because I decided that the charm would hang from the highest and fall across the other strands. 
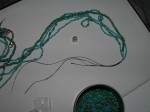
I used a very tiny beading needle to thread each strand up, through the cap, silver beads, and around the jump ring that the clasp will connect to, and then back through the silver beads and bead cap.

I knotted the strands just beneath the caps and secured the knots with a dot of glue to reinforce them. Then, I started threading the strands with the beads.

Two strands were dyed, wooden beads and the rest were seed beads. All of the strands are just straight stringing. I repeated the knotting and gluing in reverse order to seal the other end.

Then I added the clasp on each side, knotted and glued it. As the final touch, I used a jump ring to attach the charm to the shortest strand of the necklace.


If you can use both hands and have two sets of pliers, this is a pretty good tutorial on how to do this. In one of the photos below, you can see an assortment of jump rings with the bull head. I chose the jump ring based on where I wanted the charm to lay across the other strands. I tried a couple different options and even used the largest jump ring to group all of the strands together and let the bull fall beneath them, but I ended I liked it hanging from the shortest strand the best.
I apologize for the quality of the pictures in this post, I took these all inside with artificial light and I think I got a bit impatient.
Bracelet:

The bracelet that matches this necklace uses a similar strategy for stringing, but I wanted something a little more ornate so I used the bull head charm in the middle of two groups of beads since it has loops on both horns. I also added a flat spacer that has some detailing on it and I used a clasp with a similar detail.
To make this bracelet, I measured out the final length that I wanted the bracelet to be and then added some extra thread for knotting because it’s always easier to trim extra threads.
I strung the strands separately and then tied a tiny knot in each strand to keep the beads from slipping before knotting them together and then through one end of the flat metal spacer.

I decided, after a little trial and error, to cut the string and use separate sets of strands to go from the flat spacer to the bulls head and then from both of those to the clasp. Essentially, you create short sections of beads to tie the metal pieces together.

To keep the strands separate, I made sure to knot each individual strand on each end before tying them to each other and the metal pieces. This is one of the first tutorials that I’ve staggered my way through, so please be sure to let me know if this is confusing! I prefer to tie overhand knots and then a double knot but there are lots of knotting tutorials on sites such as Youtube and even from manufacturers like Beadalon. I also use a small dot of glue to secure the knots because I learned the hard way that there’s nothing more frustrating then picking up a zillion little beads off of the floor. In a pinch, clear nail polish can work in place of glue.
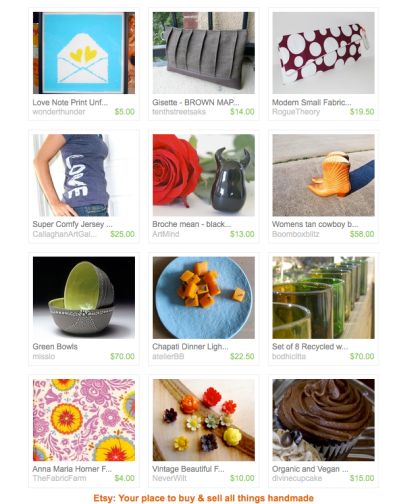
Here’s a mix of some of my favorites from Etsy:
 Since it seems like the clicking is disabled, here’s the details from upper left to the right and across each of the rows from top to bottom:
Love Note Print Unframed by wonderthuder
Gisette Brown Maples clutch by tenthstreetsaks
Modern Small Fabric Clutch Puerto Sherry by Rogue Theory
Jersey Tee with Love screenprint by CallaghanArtGallery
Broche mean black Devil by Artmind
Womens Tan Cowboy boots 11 (my size!!!!)
Green Bowls by Misslo
Chapati Dinner Light Blue by atelierBB
Set of 8 Recycled wine bottle Glasses by Bodhicitta
Anna Maria Horner Fabric: Fortune in Sun in The Fabric Farm’s shop
Vintage Flower Cabochons in NeverWilt’s Shop
Organic and Vegan Chocolate Cupcake Mix by divinecupcake